
Seasonal Product Development
Fall/Winter Collection Development: A Factory-Ready Guide for Fashion Brands
Build an Autumn/Winter range around the selling date, intended layers, material system, sample approvals, quantity and quality requirements—before bulk cutting begins.
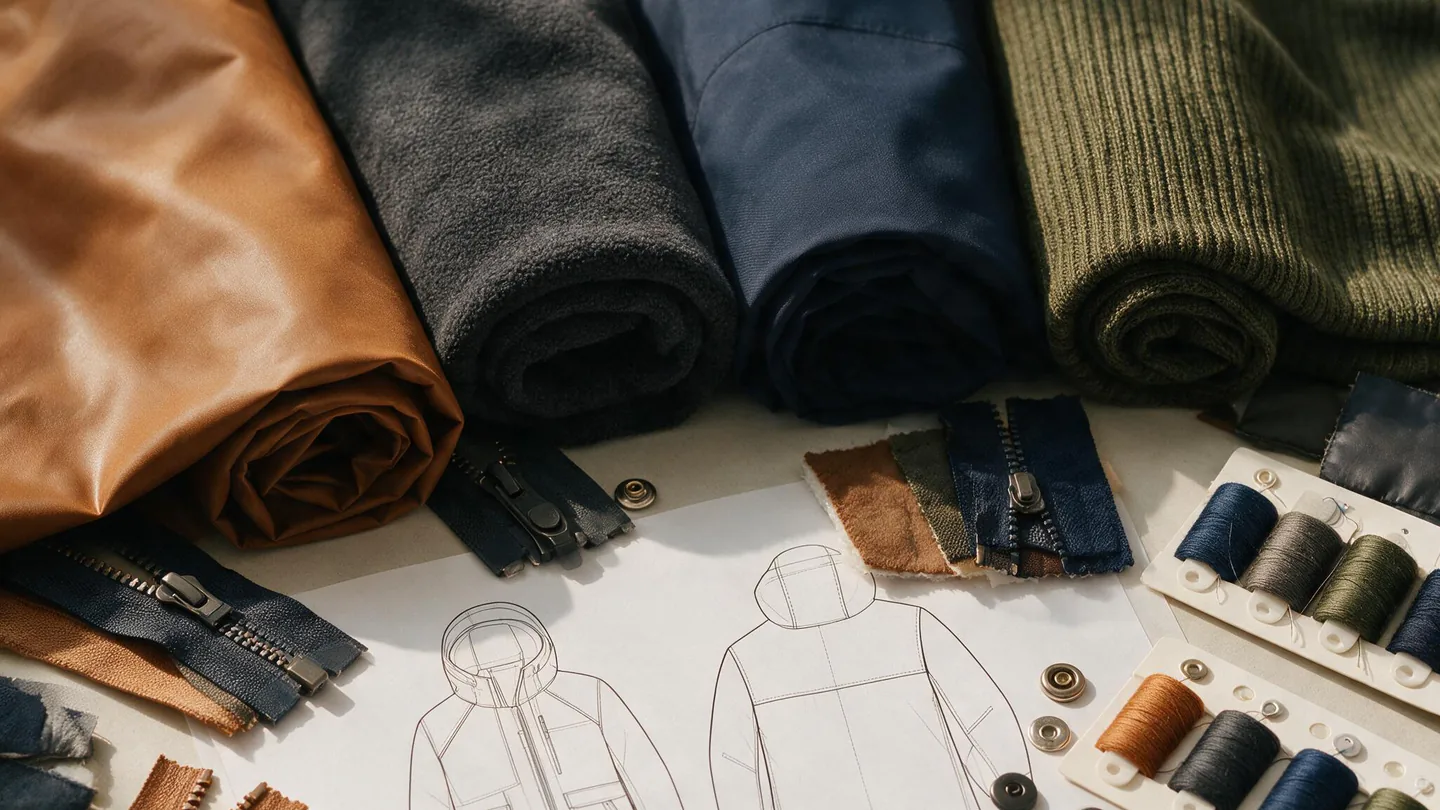
1. What Fall/Winter Collection Development Actually Includes
Fall/Winter development turns a range plan into approved materials, samples and a calendar.
The process starts before a garment is sampled. A brand first defines what the collection must do: where and when it will sell, who will wear it, which garments work together, what each style may cost and which delivery date controls the project. Product development then converts that commercial direction into specifications, sourced components, patterns, samples, approval records and a bulk-production release.
Creative direction still matters, but it is only the starting input. A visual study such as our autumn apparel design inspiration can establish silhouette, colour and styling. A moodboard-to-sample process can translate that direction into clearer garment details. Neither replaces the production decisions needed for a seasonal range.
Winter garments carry extra development risk because several components must work together. A jacket may combine shell, membrane or coating, insulation, lining, interlining, zipper, snaps, elastic, cord, seam tape and quilting. Change the fill thickness and the internal volume may change. Change the shell and the seam construction or needle choice may need review. Add a mid-layer under the jacket and the armhole, sleeve and chest fit must still allow movement.
Before requesting a firm quote, fix the target market and delivery date; style list; colours, sizes and quantities; material and performance direction; branding, trims and packaging; and a target cost or retail architecture. A complete tech pack makes review faster, but it is not the only way to begin. Clear references, measurement priorities and estimated quantities can support an initial feasibility review when every open assumption is identified.
2. Build the Range Around Climate, Use and Price
Define climate, use, layers and price before selecting Fall/Winter materials or finalising SKUs.
Start with the use case, not a trend label. “Winter jacket” could mean a commuter layer, water-resistant city shell, insulated casual coat or technical garment with specified weather performance. Those products require different materials, patterns, trims and tests. Do not assign a temperature rating unless the complete garment has been validated against an agreed method.
Choose an anchor and supporting layers
An anchor style carries the collection’s strongest product idea and usually deserves the deepest development work. Supporting styles should make it easier to merchandise and wear that anchor, not create unrelated production problems.
For example, a four-style range could contain one outerwear anchor, one brushed-fleece zip layer, one French-terry sweatshirt and one base layer. Two core colours can cross several styles while one seasonal colour is reserved for the anchor. This example makes every SKU’s role and shared materials visible before sampling.
Connect retail position to a cost ceiling
Define the intended retail band, selling channel, duty and freight assumptions, margin requirement and target FOB ceiling before asking the product team to add features. Without that ceiling, the collection can accumulate custom zippers, special dye colours, mixed fills and low-volume trims that cannot fit the final price.
The target cost is a design constraint, not a request to remove controls. If the initial range is too expensive, first reduce colourways, consolidate shell or lining options, simplify nonessential trim variations, or move one experimental style to a later drop. Removing sample or inspection gates creates a different cost: an unresolved problem reaches more units.
Separate hemisphere calendars
Northern and Southern Hemisphere ranges may share product development, but each needs a calendar built from its in-market delivery date. A second run also needs confirmed material reservations, colour standards and capacity; one market’s approved pattern may not suit another market’s size distribution or climate.
3. Plan Backward from the Selling Season
Start outerwear at least four months before selling, then add freight and approval buffers.
The selling date—not the sewing start—should control the apparel production calendar. GoVoloom’s current category guidance places outerwear sampling at 10–14 days and bulk production at 35–50 days, subject to design complexity, approved materials and capacity. Those ranges do not include every activity before and after sewing: brief clarification, fabric booking, lab dips, fit corrections, pre-production approval, inspection, freight and customs all affect total lead time.
| Backward point | Main decision | Release condition |
|---|---|---|
| 4+ months before selling | Range brief and early sourcing | Styles, quantities, target costs and critical dates defined |
| After material direction | Proto and fit work | Feasible components and layered-fit decisions recorded |
| After fit approval | Revised or pre-production sample | BOM, measurements, colours and trims frozen |
| After all required approvals | Outerwear bulk production, typically 35–50 days | Approved reference, materials and order details confirmed |
| Before shipment | Inspection, packing and logistics release | Agreed quality gates and buyer’s logistics plan completed |
This is a planning example, not a guaranteed schedule. Rebuild the dates for each project. Custom-dyed shell or moulded hardware can require earlier booking; stock fabric removes a step only after availability is confirmed. Photography should use an approved sample, not force bulk cutting from an unapproved one.
Some work can run in parallel. Packaging artwork can progress while a fit sample is reviewed, and colour lab dips may run while construction comments are closed. Other tasks are sequential: bulk fabric should not be cut before the agreed colour, shrinkage result and pre-production reference are approved. Our clothing manufacturing timeline guide explains total lead time and production time in more detail.
Every approval request should name an owner and a response date. If comments arrive late, the next material reservation or production window may also move. A calendar becomes useful when it shows dependencies and decisions, not only optimistic completion dates.
4. Turn the Concept into a Winter-Ready Tech Pack
A winter-ready tech pack defines layered fit, materials, trims, performance and approvals.
A Fall/Winter tech pack uses the same core structure as other apparel specifications, but it needs more detail wherever layers and components interact. The document should show front, back and relevant internal views; a measurement specification; construction callouts; the bill of materials; colourways; artwork; label and packaging instructions; and an approval history. Our factory quote tech-pack guide covers the full document.
Specify fit over intended layers
State whether a jacket will be worn over a shirt, sweatshirt, fleece or another mid-layer. Include the intended base garment or its relevant measurements during fit review. Chest ease alone is not enough: armhole depth, bicep, elbow movement, sleeve opening, hood volume and collar comfort can all change when the wearer adds a layer.
Break the BOM into interacting parts
List shell, coating or membrane, insulation, lining, interlining, rib, pocketing, thread, zipper, snaps, cord, stopper, elastic, seam tape, labels and packaging as separate items. Each line needs a usable specification and colour reference. “Warm padding” or “waterproof zipper” is not specific enough for sourcing or costing.
Performance instructions should describe the intended result and the agreed verification route. If water resistance is required, state which garment areas are involved, whether seams must be taped and which test method or buyer standard applies. If the garment is only intended to resist light exposure to rain, do not describe it as waterproof without a defined claim and supporting test.
When a complete tech pack is not ready, send the style list, clean reference views, priority measurements, material direction, planned quantity and critical functions. The manufacturer can then separate confirmed facts from open choices. That early review may reveal that a trim MOQ, shell finish or construction detail needs to change before quotes can be compared fairly.
5. Select Materials as a System, Not One Swatch
Approve shell, insulation, lining and trims as one system before bulk production.
A swatch shows colour and handfeel, not how a complete garment behaves. Review shell, insulation, lining, rib, closures, thread and seam tape as one construction system.

Compare mid-layer options by end use
GoVoloom’s current hoodie product data lists 300–440gsm brushed fleece and 280–360gsm French terry as development options. These are sourcing options, not universal winter recommendations. A heavier number does not automatically mean a better garment. Fibre content, knit density, brushing, shrinkage, recovery, intended climate and the layer above it all matter.
Brushed fleece has a raised inner surface; loop-back French terry has less internal loft. Compare both after the intended wash and with the planned rib, zipper, decoration and fit. Brands developing custom heavyweight hoodies should confirm whether a colour is stock-supported or custom dyed.
Our hoodie fabric comparison turns this choice into swatch, garment and care-review questions.
Build an outerwear stack
Current GoVoloom outerwear options include nylon or polyester shells specified in the 210T–320T range and insulation options in the 100–300gsm range. “T” and “gsm” describe different aspects of different materials; neither number predicts complete-garment performance on its own. Specified waterproof developments may target 3,000–10,000mm hydrostatic head where required, but the buyer’s claim, construction and agreed test method must set the actual requirement.
For fill, record loft, weight, recovery, quilt pattern, migration risk, wash response and sourcing documentation rather than using the undefined term “padding.”
Approve availability as well as appearance
Before bulk cutting, record fibre content, construction, finish and usable width; colour and handfeel after the specified wash; dimensional change and skew limits; shade-lot, MOQ and lead-time implications; and matching thread, rib, zipper tape, lining and labels.
Use the clothing fabric sourcing guide to compare categories, then test the final stack with the actual construction. A shell can still fail if its coating rejects the planned seam tape.
6. Build the Right Sampling and Approval Ladder
Each sample round must answer one named question before the style moves forward.
Sampling is not a repeated search for something that “looks right.” Each round should have a defined release condition and a written comment sheet. A simple hoodie may move through proto, fit and pre-production samples. A complex outerwear style may need proto, fit, second fit and pre-production samples, while lab dips, print or embroidery strike-offs, zipper colours and hardware finishes are approved on separate tracks.
The proto checks buildability. The fit sample checks measurements, balance and movement. A second fit helps when one correction changes connected areas such as chest, armhole, hood and sleeve. The pre-production sample represents the frozen materials, trims, construction and measurements for bulk.
Review an outerwear fit twice: first as a garment on its own, then over the intended base or mid-layer. Ask the wearer to raise and reach the arms, close the front, use pockets and move the hood or collar. Record whether a restriction comes from the pattern, shell stiffness, lining, insulation thickness or trim placement. “Add more ease” is less useful than locating the actual restriction.
GoVoloom’s general sampling guidance is usually 7–10 working days after details are confirmed; current outerwear guidance is 10–14 days. These are conditional category ranges, not promised completion dates. Custom materials, new hardware, revised patterns and delayed comments can extend the process. The clothing sampling process explains what to prepare for each round.
Before bulk release, create a sealed reference or equivalent controlled approval record. It should connect the approved sample to the final BOM, measurement chart, colour standards, artwork files and comment history. Bulk cutting begins only after the project’s required approvals are complete.
7. Understand MOQ and Cost Before Finalising the Range
MOQ depends on material, colour and construction, so compare every style route first.
A single “low MOQ” statement hides the constraints that matter. Garment quantity, fabric mill minimums, dye-lot size, zipper colour, custom labels, moulded hardware, fill supply and specialised processes can each create a different threshold. The workable order quantity is the combination of those inputs, not simply the sewing line’s preference.
| Development route | Current conditional starting point | Main variables |
|---|---|---|
| Hoodie using stock fabric | From 50 pieces per style | Stock colour, size split, decoration and trim availability |
| Hoodie with custom fabric or dye colour | From 100 pieces | Mill and dye-lot minimums, shade approval and lead time |
| Outerwear style | 100 pieces per style | Shell, lining, fill, zipper, hardware and construction |
| Complex technical jacket | May require 200 or more | Custom components, taped seams, performance specification and capacity |
These figures are review starting points, not a binding quote. A brand should state quantity by style and colour so the factory can check the actual material and component minimums.
Outerwear cost changes when the BOM adds fill, lining, pocket systems, multiple zipper types, special hardware, quilting, bonding or seam taping. Placement and construction also matter: two jackets using the same shell can require different labour and equipment. Without the full style information, a price comparison may be comparing different products.
If MOQ pressure appears, reduce colourways before removing necessary development or quality steps. Sharing one lining, rib, zipper tape or core shell colour across selected styles may help, provided the material genuinely suits each garment. Do not merge specifications merely to hit a number; a material that works in a casual vest may not meet the movement or weather needs of the anchor jacket.
8. Set Seasonal Quality Gates Before Bulk
Set test methods and pass criteria before bulk so failed results have a defined action.
Quality gates should follow the risk of the garment. The same generic test list does not suit every hoodie and jacket. For each material or component, identify the risk, sample stage, method, acceptance limit, responsible reviewer and action after failure. Buyer standards and the agreed method control acceptance; generated visuals and supplier descriptions do not.

| Risk area | Approval or test | Timing | Action after failure |
|---|---|---|---|
| Fleece or knit body | Dimensional change, skew, pilling and appearance after specified wash | Before final pattern release and if the bulk lot changes | Adjust finish or pattern, resample, change material or revise the agreed requirement |
| Navy, black or deep shade | Wash colourfastness plus dry and wet rubbing | Before bulk material approval | Correct dye or finish, retest, change material or agree a revised use condition |
| Weather-resistant shell | Hydrostatic head, spray response and seam-tape adhesion when specified | On sourced material and representative construction | Correct coating, tape or seam parameters; retest before claim or release |
| Insulated garment | Fill identity and weight, distribution, quilting and migration review | Sample and inline stages | Correct BOM, pattern or quilting before affected units continue |
| Zipper, snap, cord and stopper | Specification, placement, operation and attachment | Sample, incoming and inline checks | Quarantine affected components and replace or correct before packing |
| Finished order | Workmanship, measurements, appearance, function and agreed AQL plan | During production and final inspection | Rework, sort, replace or hold shipment according to the agreed disposition |
Test the actual production fabric and finish for dimensional risk; guessing pattern compensation can create a second error. The fabric shrinkage testing guide connects the result to pattern and bulk release.
Deep shades can transfer colour to pale layers or linings, so dry rubbing, wet rubbing and laundering need separate review. Official references include ISO 12945-2 for pilling, ISO 105-X12 for rubbing colourfastness and ISO 811 for hydrostatic pressure. Agree the applicable version, specimen preparation and pass level; a method name alone is not a claim. Our fabric colourfastness guide covers the production decisions.
For weather-protection products, test the specified claim and construction. A shell result does not prove a garment is waterproof if seams, pockets or closures permit entry. Check seam-tape adhesion on the actual shell and seam.
Final inspection compares the order with its approved reference, specification and sampling plan. AQL is an acceptance-sampling framework, not a zero-defect promise. Our AQL 2.5 guide covers defect classes and acceptance numbers.
9. Send a Quote-Ready Fall/Winter Development Brief
A quote-ready brief states market, date, styles, quantities, materials, budget and delivery.
The factory can review an incomplete concept, but a useful quote must separate confirmed inputs from assumptions. Put the following information into one folder or message thread so the reviewer does not need to reconstruct the project from scattered screenshots:
- target market, hemisphere, selling date and required delivery date;
- style list and a short description of each garment’s use;
- colourways, size range and quantity per style and colour;
- tech packs, measurements or clean reference images;
- shell, knit, lining, fill and performance direction;
- decoration, labels and placement files;
- zipper, snap, cord, rib and other trim direction;
- packing requirements;
- target FOB budget or retail and margin architecture;
- delivery country, trade term if known and critical approval dates.
Mark open decisions plainly. For an undecided shell, rank appearance, handfeel, water resistance, cost and stock availability. Give a realistic quantity range and identify which missing measurements or details the factory should propose.
Fall/Winter Collection Development FAQ
The answers below turn common seasonal planning questions into concrete development decisions.
When should a brand start developing a Fall/Winter collection?
Begin complex outerwear at least four months before selling, then work backward from delivery. Custom fabric, new hardware, extra sample rounds or fixed launch dates may require more time.
How long does Fall/Winter collection development take?
There is no single duration for every project. Current outerwear guidance is 10–14 days for sampling and 35–50 days for bulk after approval; sourcing, revisions, testing, inspection and logistics add time.
Is a complete tech pack required before contacting a manufacturer?
No—clear project information can start a feasibility review before a complete tech pack is ready. Final quoting and sampling require open assumptions to become specifications.
How many samples should an outerwear style plan for?
Plan by decision, not a fixed count. Complex outerwear may need proto, fit, second fit and pre-production samples plus separate colour, decoration and hardware approvals.
How do fabric MOQs affect the number of colours?
Each custom colour may create a dye-lot or mill minimum. Stock colour may support a lower starting point; custom fabric or dye colour may move a hoodie from 50 pieces to 100 or more.
Which tests matter for winter materials?
Tests should follow the garment’s actual material, colour, weather, fill, hardware and inspection risks. Examples include dimensional change and pilling for knits, colourfastness for deep shades, specified shell and tape tests, fill checks, hardware function and final inspection.
Can a seasonal production timeline be shortened safely?
Sometimes, when stock materials, existing components and prompt approvals remove dependencies. Never shorten it by cutting bulk before fit, colour, material or pre-production approval.
Does a Southern Hemisphere launch need a different calendar?
Yes—its dates must work backward from the Southern Hemisphere delivery window. Shared designs may still need different production windows, size distributions, materials or replenishment plans.
Start a Fall/Winter Development Review
A useful development review starts with the commercial and product information already available.
Send the market, launch date, style list, quantities, tech packs or references, material direction, branding, target cost and delivery country. We will identify the open assumptions before discussing a project-specific route.