Design views
Front, back and side are preferred. Front and back are the minimum; a front view alone is not sufficient. Check that the views describe one consistent garment.
The selected design shown clearly from the required views.A practical guide for clothing brands
Bring four things: clear design views, a reference size, fabric requirements and fit requirements. GoVoloom can help develop that starting point into the pattern, technical decisions and sample needed to make the garment.
What the factory needs to start
You do not need a complete tech pack to begin. Explain the design and the result you want; we can develop the technical details together.
Front, back and side are preferred. Front and back are the minimum; a front view alone is not sufficient. Check that the views describe one consistent garment.
The selected design shown clearly from the required views.Give a starting size for the sample, such as M, and the intended wearer or market. Add a size chart, useful garment measurements or a reference garment if you have one. A size label starts the discussion; the corresponding measurements still need agreement.
A reference or base size, with the sizing reference you have.Describe the fabric you want: composition or construction if known, a weight direction, stretch, surface and feel. A swatch or clear reference can help. Describe the desired result when the exact specification is still undecided.
A fabric direction the factory can help refine.Say how the garment should fit: regular, relaxed, boxy, oversized or another clear direction. Explain body length, width and sleeve or leg volume where they matter. Use a reference garment and note what you would change.
The intended shape and wearing fit.These four inputs begin the development conversation. Add a size chart, reference garment, swatch or original artwork where available. Use the project planner to keep the information and open questions together.
A visual development example
Keep the selected design attached when creating another view. Compare the result with the drawing before carrying its details into the brief.
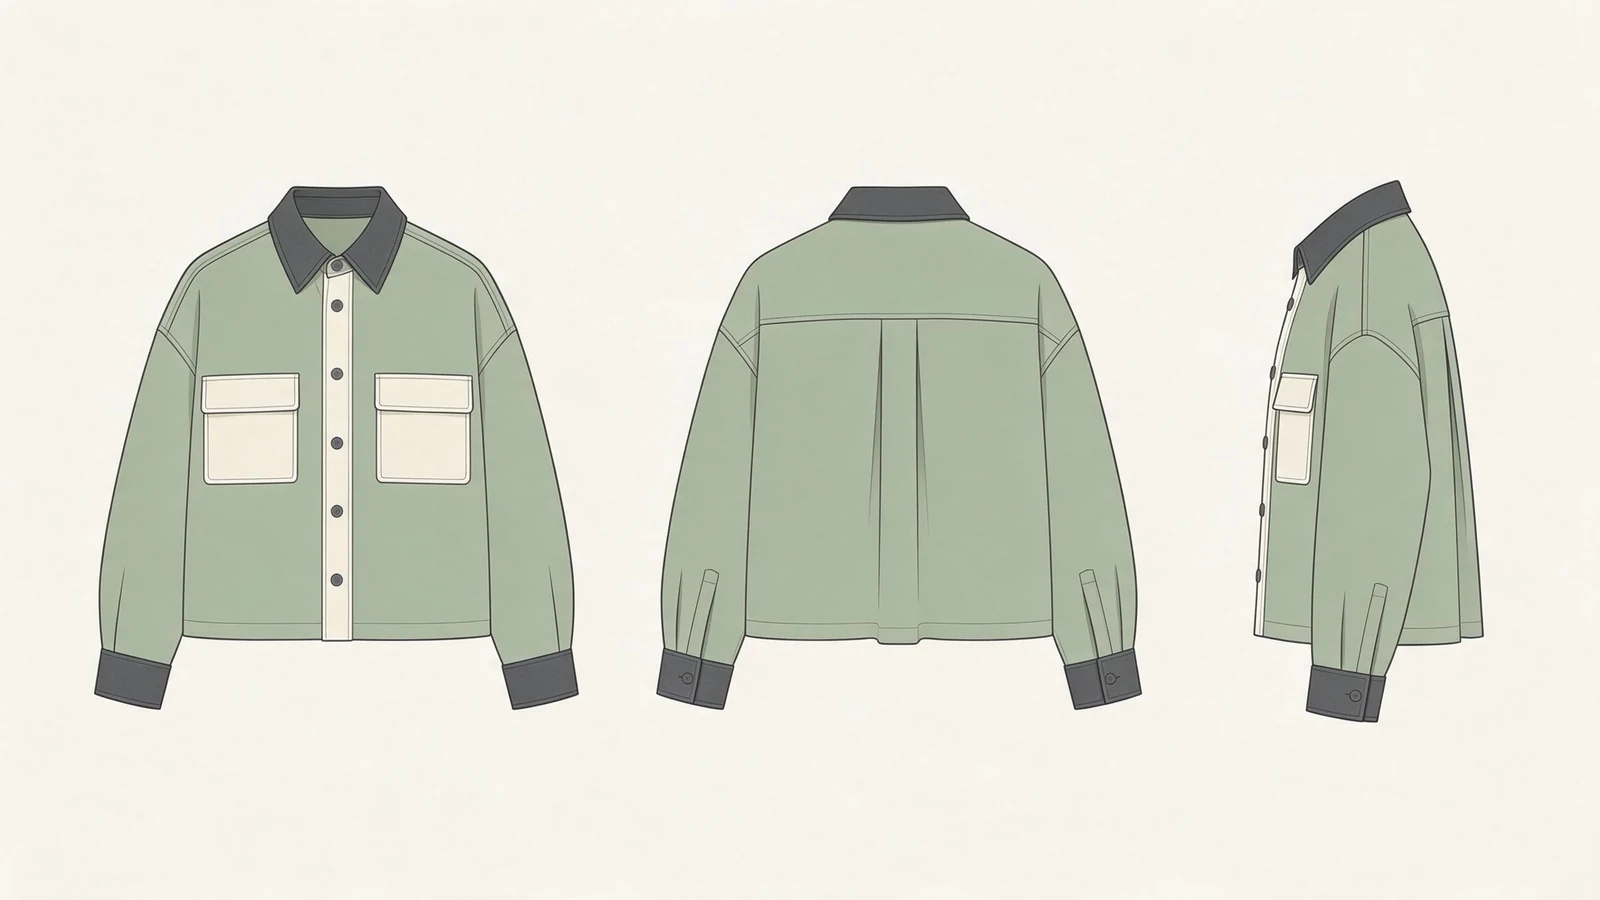
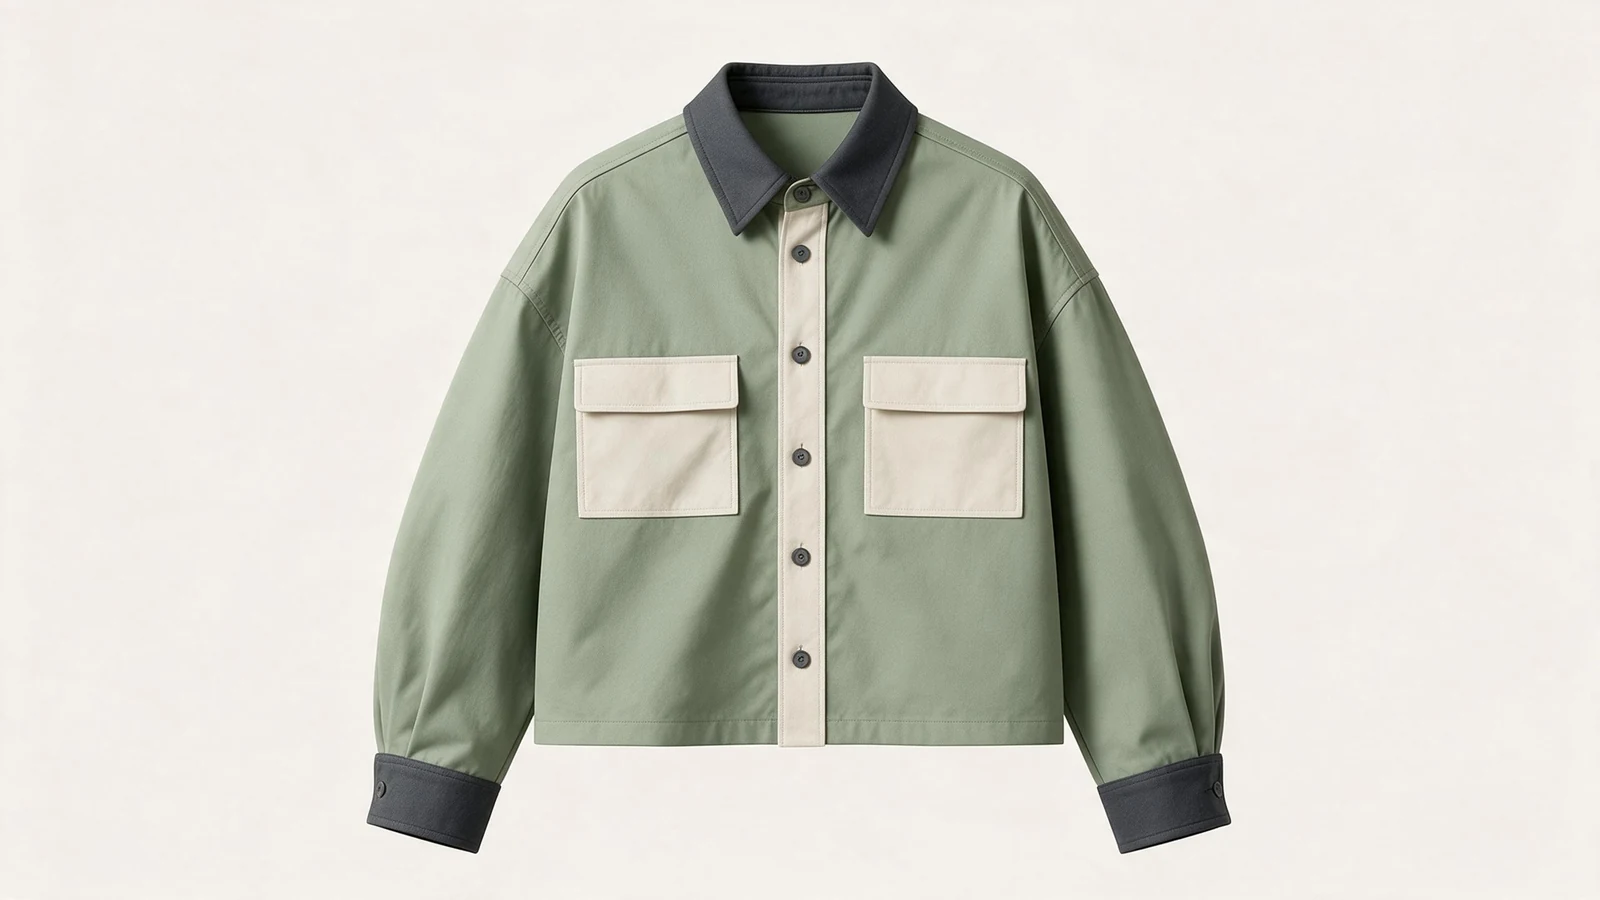
Resolve the difference, not just the image. If a pocket moves or a seam disappears, choose the intended detail and update the reference. The factory should not have to choose between conflicting designs.
A visual target still needs development. These illustrations do not establish a sewn sample, exact dimensions or tested fabric. Bring the reference size, fabric direction and intended fit alongside them.
A filled-in example you can follow
The request below uses the design shown above. The size, fabric and fit requirements are example choices for discussion; the images do not establish measurements or material specifications.
These four inputs begin the development conversation. GoVoloom can help clarify the technical details, prepare the pattern and develop the physical sample. A complete customer-prepared tech pack is not required to start.
Define any missing back or side details first. If you are revising an existing design, attach the selected image in your image tool and check each result against it.
Create front, back and side design views of one adult boxy overshirt, at the same scale on a plain background. Use a sage body and long sleeves, charcoal collar and cuffs, a cream button placket and two cream flap pockets. The back has a yoke and a centre box pleat. Show dropped shoulders and a relaxed, short and wide silhouette. Keep the collar, seams, pockets, cuffs, closure and hem consistent across views. Show the full garment without a person. Do not add logos, measurements or decorative text.
The prompt describes a visual design. Review the resulting views before adding the reference size, fabric requirements and fit requirements to your factory brief.
From first idea to a physical garment
Use AI to explore the design. Work with the factory to resolve the fit, material and construction decisions that an image cannot settle.
Name the garment, wearer, reference size, fabric direction and intended fit. Describe the construction and colour placement before adding mood or styling words.
Take forwardA brief with a clear design priority.
Compare a few directions. When one works, save the image, prompt and version name. Record what to keep and what to change.
Take forwardOne selected design direction.
Decide the unseen back and side details, then attach the chosen image as a reference in your tool. Check that the front, back and side describe the same garment.
Take forwardFront and back minimum; a side view preferred.
Share the four starting inputs. The factory can help clarify the measurements, materials, pattern and construction. Mark decisions that are still open.
Take forwardA development scope agreed for your project.
Agree what the sample needs to answer: proportion, fit, fabric behaviour or a construction detail. Record any substitute materials and specifications.
Take forwardA physical garment to review against the brief.
Check fit, movement, details and materials. Record changes against a dated version. Confirm the applicable sizes, materials and approval reference before bulk production.
Take forwardA documented sample review and approval decision.
What the factory develops with you
The four starting inputs open the conversation. The details below are resolved during development; you do not need to invent a finished technical specification before asking for help.
Use the reference size and fit direction to agree the corresponding finished-garment measurements and measurement method. A label such as M is a starting reference, not a universal set of dimensions.
Start with size and fit referencesFabric construction, composition, weight direction, feel and colour reference. A rendered texture cannot confirm fibre content or material performance.
Compare fabric directionsWhich lines are seams, where openings sit, how panels join and which trims are required. Add detail drawings where a view remains ambiguous.
Organise a project briefThe actual artwork version, finished size, position, colours and the proposed process. Prepare decoration separately, then review it on the intended material.
Prepare print artwork for samplingPattern development, material selection, physical sample scope and a recorded review. Confirm any changes before treating the sample as a production reference.
Plan the sample reviewA design image does not establish a checked cutting pattern, grading rule or embroidery machine file. Pattern work and digitising are separate technical steps. Prepare logo and name embroidery details
Tool 01 / Put the idea into words
Describe what matters, then copy the prompt into your chosen image tool. Keep backgrounds simple and use your own artwork or material you have permission to use.
This tool writes text in your browser. It does not generate an image or contact an AI model.
Tool 02 / Prepare the factory conversation
Record what you have and what still needs help. This checklist prepares a conversation; it does not approve a design for manufacturing.
Front and back are the minimum. Front only leaves this requirement incomplete, even when the other three inputs are supplied.
A starting size is useful without a complete size chart. Mention a reference garment or measurements if you have them.
Copy or download your notes before leaving. This tool does not transfer them to another page or send an enquiry.
Questions before you begin
Bring the direction you want and the information you have. We can discuss what needs to be developed next.
A front view alone is not sufficient for GoVoloom’s design handoff. Front, back and side views are preferred; front and back are the minimum. Decide the back and side details before generating those views, then check that the neckline, seams, pockets, closures and artwork agree across the set.
Yes, an AI design can start a development discussion without a complete tech pack. For GoVoloom, bring front and back views at minimum, a reference size, fabric requirements and fit requirements. The factory can help clarify measurements, materials, construction and the sample scope. Agree the technical decisions and responsibilities before the relevant development or sample stage.
Give the intended wearer, market and reference or base size, such as M, together with the fit you want. Share a reference garment or useful measurements if available. A size label is enough to identify your starting point, but it does not define exact garment dimensions. GoVoloom can help clarify the measurement requirements through development; you do not need to invent a complete chart.
The selected design is a visual target. Fabric behaviour, proportions, construction and decoration can change how it looks in a sewn garment. Record the details that must be preserved, review proposed changes and compare the physical sample with the agreed drawings, specifications and material references before approval.
Send four things: front and back design views at minimum, a reference size, fabric requirements and fit requirements. Front, back and side views are preferred. Add a size chart, reference garment, swatch or artwork where available. Orders start at 50 pieces. GoVoloom can review the development and sample scope with you; fees, revisions and timing are confirmed in writing.
Take the next step
Share your design views, reference size, fabric requirements and fit requirements. We can review the pattern and sample development scope with you. Fees, revisions and timing are agreed for your project in writing.
MOQ: 50 pieces.