
Adult Streetwear · Jacket Development
Color-Block Jacket Development: Panel Mapping Before Sampling
A colour-block jacket can look clear in a reference image while leaving several production decisions open. A curved stripe might be a separate fabric panel, an applied strip or a printed area. A chest division might stop at a pocket, run behind it or continue across the front closure. Those choices change the pattern, construction and material requirements.
Before sampling, turn the visual idea into a panel map: identify each area, its material and colour reference, how the boundary is made, and where it should meet another feature. That gives a brand and a manufacturer something specific to review when the first garment differs from the drawing. Each illustration serves as a separate design or structure reference.
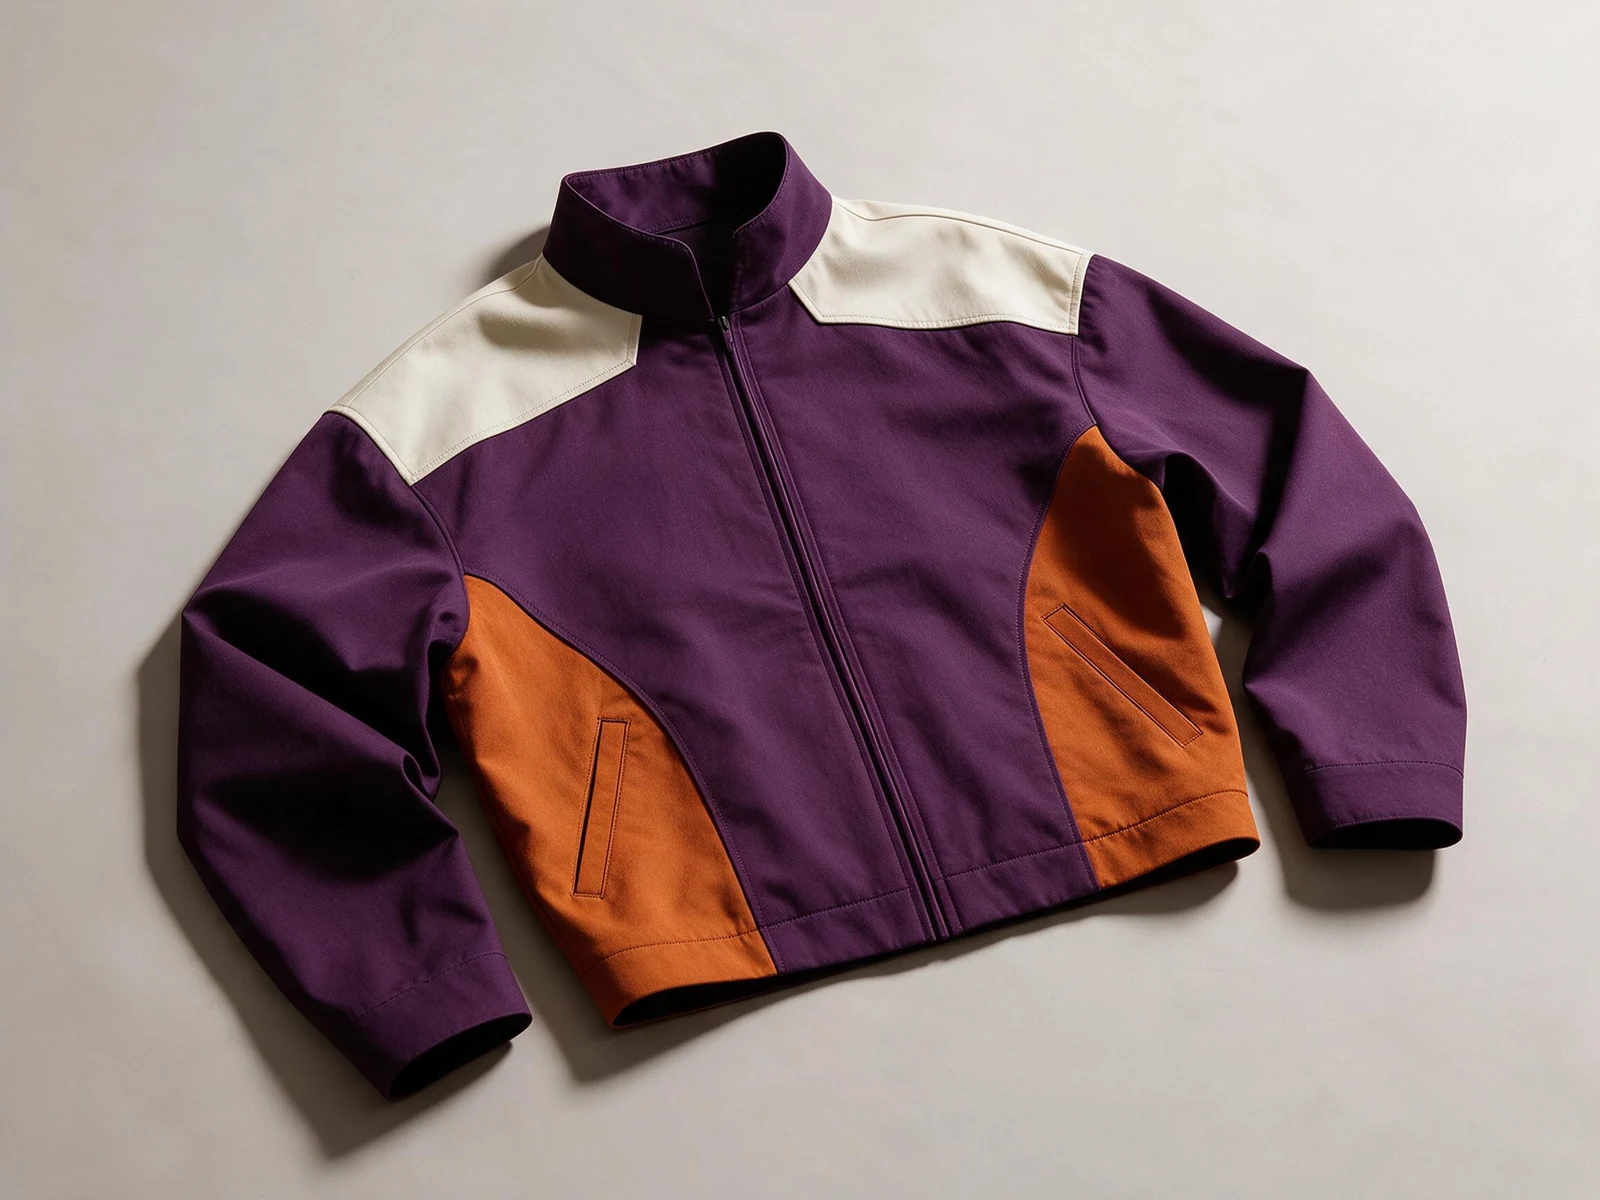
1. Decide whether each colour boundary is a seam
Label every colour area and state how its boundary is constructed. Colour blocking describes an appearance; it does not specify a sewing method. Start with front and back views, adding a side or sleeve view when a panel wraps around the body.
Give panels stable identifiers such as P01, P02 and P03. These are example labels, not a required coding system. Use the same identifiers on the drawing, bill of materials and revision notes. Write “wearer's left” and “wearer's right” when the layout is asymmetric. A mirrored photograph can otherwise turn an intentional design into the opposite arrangement.
For each area, separate the material reference from the colour reference. A dark body and pale yoke may use the same fabric construction in different colours. A smooth body and textured insert may require different constructions. Neither choice can be established from screen colour alone.
| Field on the panel map | Decision to record |
|---|---|
| Panel or area ID | Which front, back or sleeve region it describes |
| Material reference | The proposed fabric, finish and any substitute |
| Colour reference | The agreed swatch or colour standard for that material |
| Boundary construction | Sewn join, applied strip, print or another specified treatment |
| View and orientation | Wearer's left/right, face direction and adjoining panels |
If the concept is still open, mark the boundary “construction to confirm.” That is more useful than drawing a line that appears to be an approved seam. The tech pack section checklist provides the wider document structure around this panel information.
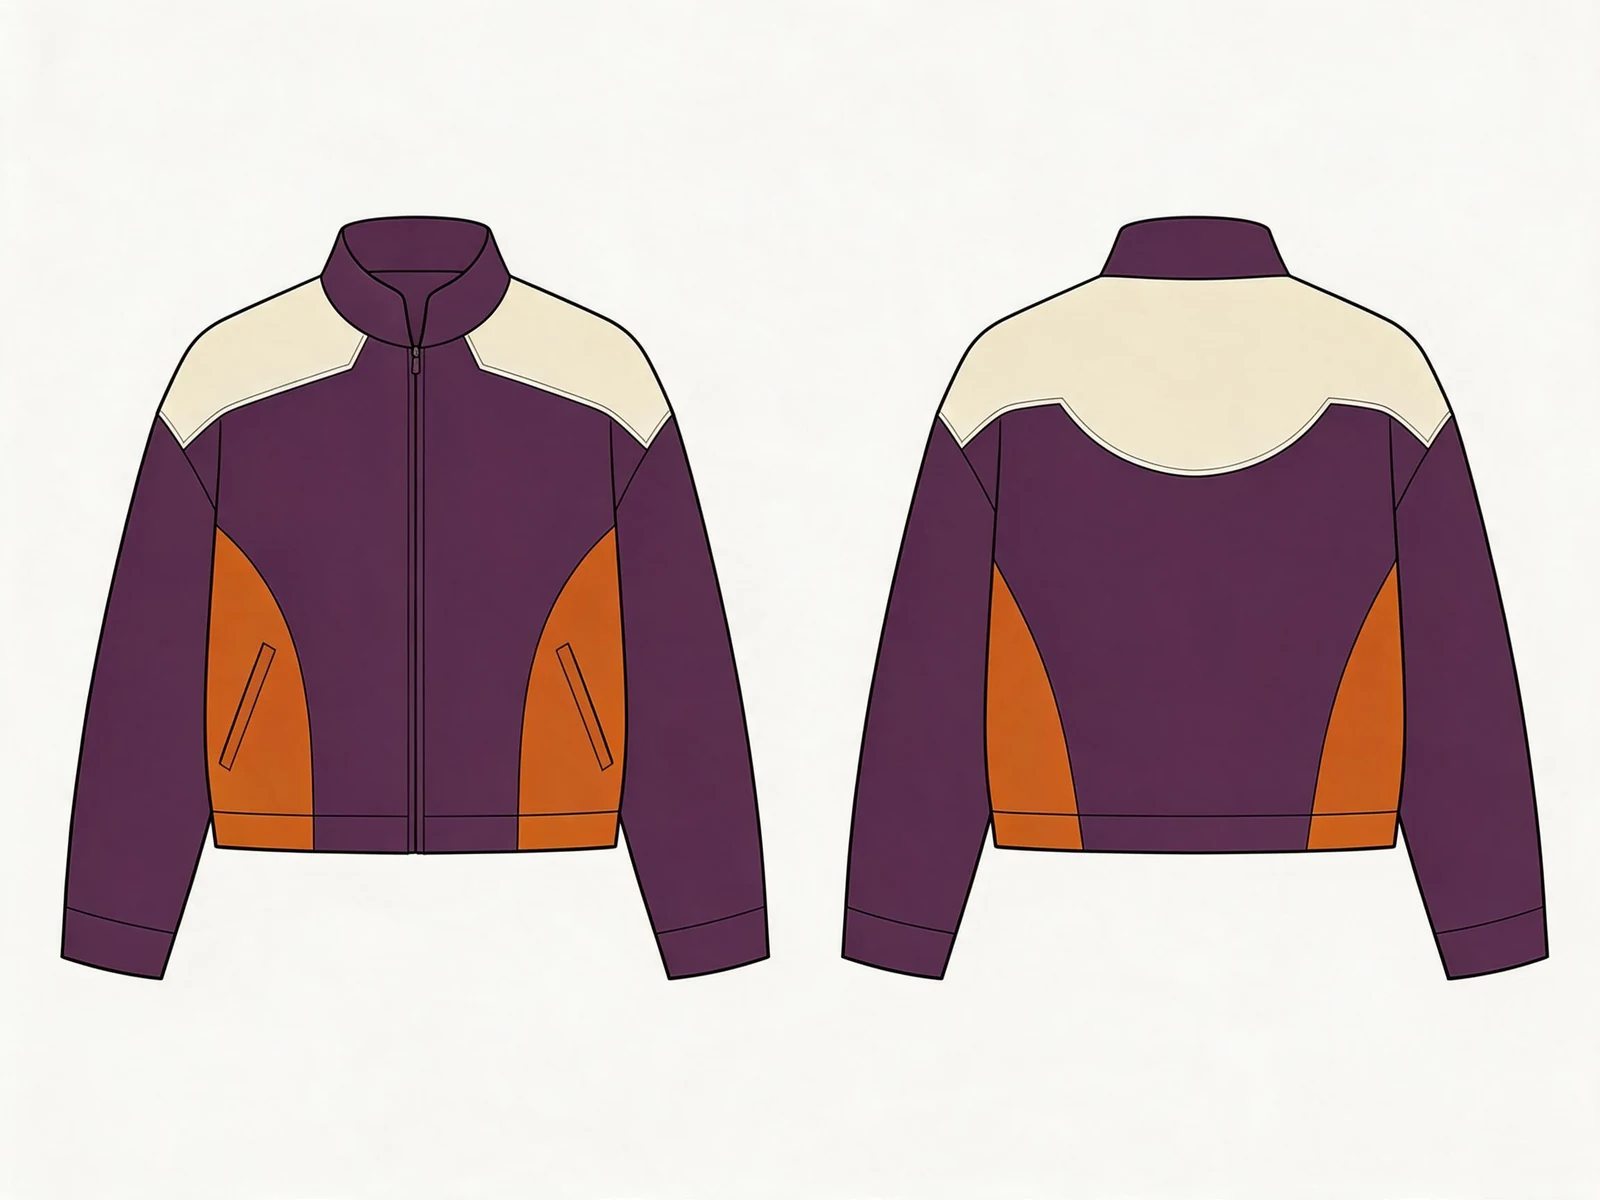
2. Define where panel lines meet closures and pockets
Name the finished alignment points before agreeing the pattern. For a front-opening jacket, explain whether the colour division should appear continuous when the zipper or placket is fully closed. Check the top and bottom fastening positions, then identify the crossing points that matter to the design.
A useful callout might say: “The lower yoke seam meets the centre-front closure at the same level on both sides, with the jacket fully fastened and laid flat.” Add the agreed measurement route and acceptance limit separately. The wording defines the observation; it does not supply a universal tolerance.
Distinguish the finished seam line, visible topstitching and cut edge. Seam allowance is part of the pattern and is not normally the visible boundary on the finished garment. Measuring a coloured area to a cut edge in one document and a stitch line in another can produce different interpretations of the same drawing.
Pockets create another decision. If a contrast band crosses a flap or patch pocket, specify whether it continues through that component. For an overlapping front, show which edge remains visible when closed. Draw the open view if it reveals another material or colour area. A clean closed-front drawing does not explain the hidden overlap.
Treat each important intersection as its own checkpoint. A small mismatch at a high-contrast chest seam may read differently from a curved side insert. Agree acceptable variation for the design, materials and construction instead of copying a single limit across every seam.
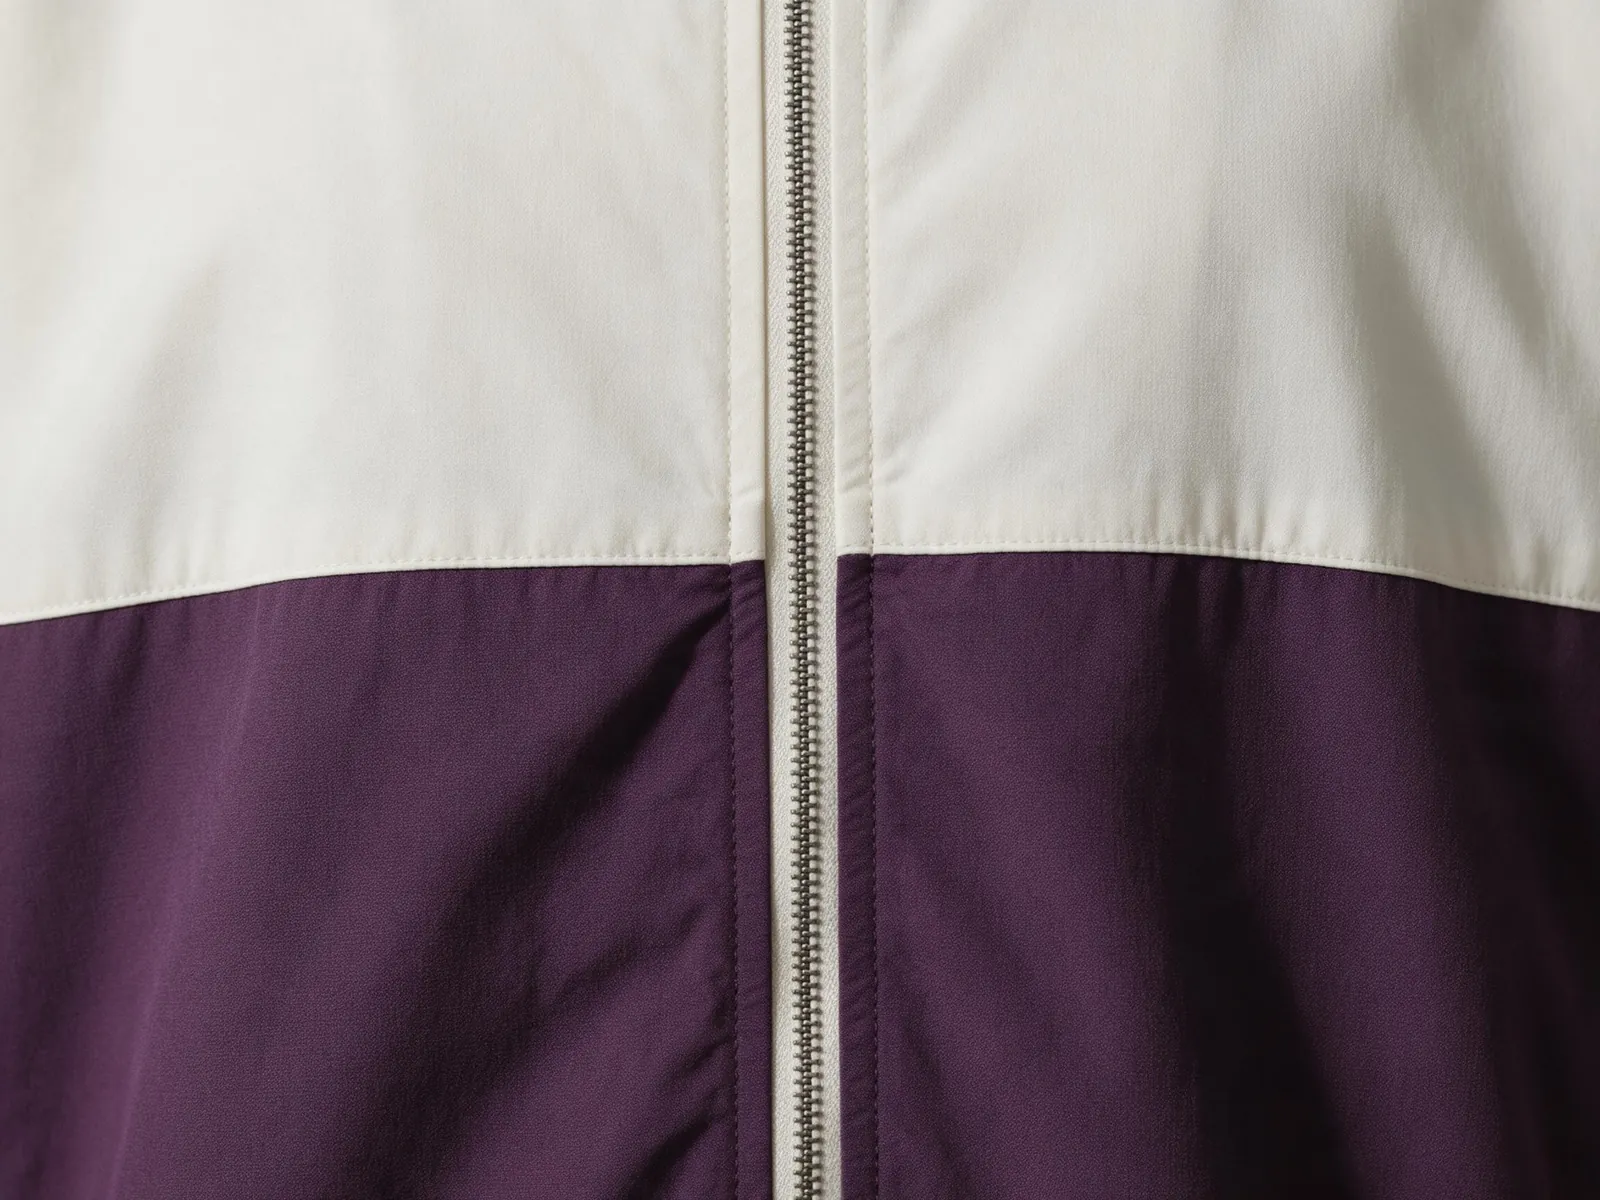
3. Check adjacent materials as a combination
Approve the material combination as well as the individual colours. Two fabrics can look compatible as loose swatches yet behave differently after joining. Record construction, composition, finish, weight and relevant stretch direction for each proposed fabric; weight alone does not describe how the joined panel will hang.
Consider a structured woven body beside a softer insert. The seam may sit differently because the components have different stiffness or thickness. A stretchy insert can change local movement, while a directional surface or nap can change appearance when a panel is rotated. Ask the technical team to identify grain and surface direction on the pattern where these affect the result.
Use the fabric comparison tool to organise candidate directions. Its categories and weight converter support a brief; they do not establish available stock, performance or suitability for your exact jacket. Keep the actual material references attached to the sample record.
Discuss whether a joined trial or garment review is needed in the intended care conditions. Differential dimensional change can distort a panel boundary, and a dark panel next to a pale one makes unwanted colour transfer especially visible. The colourfastness guide explains the questions to raise about the intended use and care method. Any test method, specimen, acceptance criteria and report scope should be agreed for the project.
A photograph of a clean seam cannot prove shrinkage, colourfastness or wash durability. If a development sample uses substitute fabric, identify it and keep approval of the intended final material open.
4. Preserve the panel design across fit and size changes
Decide which panel landmarks stay fixed and which move with the garment. A jacket can retain the same overall chest measurement while a yoke becomes visually deeper, a side insert becomes narrower or a sleeve band shifts away from its intended position. Fit dimensions and panel proportions need coordinated review.
Start with the agreed base size. Mark the panel boundary against named garment references, such as the centre-front line, finished neckline seam or hem. A curved line may need more than one reference point to describe its path. Ask the pattern team to translate that design intent into workable pattern geometry, including the necessary seam allowance.
For the wider size range, explain what should remain visually consistent. A contrast strip may keep an agreed finished width while its length changes. A larger panel may need to change in relation to the body. Neither rule should be assumed for all features, and a drawing for one size is not a complete grading instruction.
Review relevant sizes with the closure in the same position and the intended underlayer identified. Check front, back and side views, including where a sleeve panel meets the body. Keep deliberate asymmetry separate from an unintended mismatch. The approval record should say which views and sizes were reviewed.
When the fit changes, revisit the affected panel map. Moving a pocket, lowering an armhole or shortening the jacket can disturb the colour layout even if the palette stays unchanged. Request an updated drawing alongside the next sample rather than carrying forward an obsolete panel diagram.
5. Write one revision record for the next sample
Keep the panel map, material references and sample comments on the same revision. Separate what you observed from what you want changed. “The chest divisions sit at different levels when zipped” describes an observation. “Align the two finished chest seam intersections while retaining the approved yoke depth” states the intended result.
The technical team can then propose the pattern or sewing correction. Avoid prescribing a hidden cause from a photograph: uneven appearance may involve pattern geometry, cutting, assembly, material behaviour or how the garment was positioned for review.
Use this compact record with the drawings:
Style / sample ID / revision date:
Base size / views reviewed / fastening condition:
Panel IDs and current drawing version:
Material and colour reference for each panel:
Temporary materials or unresolved substitutions:
Boundary construction and visible reference lines:
Closure, pocket and sleeve alignment checkpoints:
Agreed measurement method and acceptance criteria:
Observed differences, with annotated photo references:
Features to preserve / requested changes:
Sizes and material conditions requiring another review:
Approved items / open items / person confirming:
Follow the sample review process to record the scope of approval. Approval of the colour layout does not automatically approve fit, final materials or performance. If a panel is added or its construction changes, ask whether the development scope, quotation or schedule needs revision before proceeding.
For a new project, collect shell, lining, intended layers and panel requirements in the outerwear project brief. GoVoloom's MOQ is 100 pieces. Colour allocation, size allocation, materials, sample work and production terms require project-specific written confirmation; a multicolour rendering does not establish those terms.
6. Questions before sampling a colour-block jacket
Use the drawing to explain the design and the sample to check the agreed construction. Keep the following distinctions in the brief.
Does a colour-block jacket always use several fabric types?
No. It may use the same fabric construction in different colours, different fabrics, or another specified surface treatment. Identify the material and boundary construction for each area rather than assuming them from appearance.
Can a reference photo define the panel seam position?
A photo can show the design direction, but perspective and garment position can alter apparent proportions. Add named reference points, measurement routes and the relevant front, back or side drawings before using it as a production instruction.
Is there one acceptable seam mismatch for every jacket?
No. The acceptance criteria should reflect the location, visual contrast, materials and construction. Agree the observation condition and limit for each important intersection rather than applying an unconfirmed general tolerance.
Does approving the colours mean the whole jacket is approved?
No. Colour approval is one part of development. Record separate decisions for panel layout, fit, final materials, construction and any agreed performance checks, including the items that remain open.
Have a colour-block reference but no panel map? Send your jacket brief with the views you have, intended materials and the features you want to preserve. Mark unknown details so they can be discussed before the sample scope is confirmed.